Showing posts with label Birthday. Show all posts

Saturday, December 8, 2012

A Christmas Card and Retiring Items

Before I get to the list, I just want to share one of the cards we are making this Saturday, December 15th in class. If you would like to order $1 card kits to assemble on your own, you still can. See all of the options here.

Wow! There's a whole lot of change coming up soon at Close To My Heart as the Autumn/Winter 2012 Idea Book draws to a close on January 31, 2013. This time of year is always bittersweet. I CAN'T WAIT for the Spring/Summer Idea Book to come out with all of the wonderful new papers, stamps and products, but I'm so sad to see the close of my favorite Autumn/Winter Book and some of my best-loved treasures being retired. To get new, we must clean out the old, so now's the chance to get those last must-haves before they are gone forever. So without further adieu, here's the list!

I made this card using C1458 Paper Lanterns, which is about to retire for good
(card originally inspired by Vicki Wizniuk).
2012 Autumn/Winter Idea Book Retiring List 

Item#   Description                     Idea Book Page No.
Z1349 Shimmer Designer Brads 127
Z1360 Rhinestone Designer Brads 127
Z1361 Brads Red Assortment  127
Z1362 Brads Pink Assortment 127
Z1363 Brads Blue Assortment 127
Z1364 Brads Green Assortment 127
Z1365 Brads Basic Assortment 127
Z1387 Wooden Designer Buttons 125
Z1391 Buttons Clear Assortment 125
Z1395 Irresistibles™ Eclectic Chipboard Die-Cuts (the alphabet) 130
Z1465 Irresistibles™ Make-It-Count Numbers 130
Z1681 Dimensional Elements  Numbers  131
Z1761 Dimensional Elements Ornaments 131
Z1762 Dimensional Elements Snowflakes 131
Z1765 Color-Ready Arbor Wooden Shapes 130
X7147C Stella Complements Canvas Shapes 68
X7148C My Stickease® Pemberley Assortment 68
X7150C My Stickease® Victory Assortment 69
X7153C My Stickease® Florentine Assortment 69
X7158C La Belle Vie My Stickease® Assortment 38
X7160C Flirty Complements Dimensional Elements 50
X7161C Moonlight Complements Dimensional Elements 56
X7162C Pear & Partridge Complements Glittery Rub-Ons 62
Z1464 Milepost Shapes 128
Z1466 Bling Assortment 128
Z1695 Urban Felt Alphabet  130
Z1696 Keepsake Felt Alphabet  130
Z1709 Just Blooms® Petals Paper Flowers 129
Z1460 Foundry® Ribbon Slides 126
Z1711 Foundry® Binder Clips 126
Z1712 Foundry® Number Plates  126
Z1461 Décor Journaling Spots 129
Z1687 Bohemian Assortment  128
Z1689 Timeless Charms 128
Z1692 Tough Tags 128
Z1694 Bouquet Assortment 128
Z1741 Haunted Assortment 128
Z1749 Autumn Lane Assortment  128
Z1763 Boutique Assortment 128
2012 Autumn/Winter Idea Book Retiring List
Z1772 Dimensional Elements In Color—Holiday 128
Z1393 Mini-Medley Accents Black Collection  126
Z1316 Designer Ribbon Cocoa Collection 124
Z1385 Designer Ribbon Blue Collection 124
Z1615 Designer Ribbon Red Collection 124
Z1616 Designer Ribbon Green Collection 124
Z1388 Newsprint Rub-Ons  130
Z1700 Dark Chocolate Tapestry Velvet Rub-Ons 126
Z1733 Black Tapestry Velvet Rub-Ons 126
Z1743 Festive Velvet Rub-Ons  126
Z1742 Parlor Velvet Rub-Ons 126
Z1407 6" x 6" Olive Quick Pic™ Album 122
Z1408 6" x 6" Pansy Purple Quick Pic™ Album 122
Z1054 My Creations® Display Album 132
Z1378 My Creations® Banner 132
Z1614 My Creations® Memory Game 132
Z188 Craft Jars 120
Z1352 4 1/2" Colonial White Circle Cards 123
Z1353 4 1/2" White Daisy Circle Cards 123
Z1731 My Originals® Sweet Surprises Card Kit 123
X7147B My Reflections® Stella Paper Packet 68
X7148B My Reflections® Pemberley Paper Packet 68
X7150B My Reflections® Victory Paper Packet 69
X7153B My Reflections® Florentine Paper Packet 69
X7158B La Belle Vie Paper Packet  38
X7160B Flirty Paper Packet 50
X7161B Moonlight Paper Packet 56
X7162B Pear & Partridge Paper Packet 62Z1252 Cutting Knife 135
G1041 Workshops on the Go® Avonlea Cardmaking Kit 22
G1043 Workshops on the Go® Pear & Partridge Cardmaking Kit 66
G1040 Workshops on the Go® Spellbound Cricut® Kit 14
G1042 Workshops on the Go® Scroll Album Kit 23
G1044 Workshops on the Go® Advent Calendar Kit 67
G1045 Workshops on the Go® Avonlea Scrapbooking Kit 21
G1046 Workshops on the Go® Clementine Scrapbooking Kit 29
G1047 Workshops on the Go® Dakota Scrapbooking Kit 35
G1048 Workshops on the Go® La Belle Vie Scrapbooking Kit  41
G1049 Workshops on the Go® Scholastic Scrapbooking Kit 47
G1050 Workshops on the Go® Flirty Scrapbooking Kit 53
G1051 Workshops on the Go® Moonlight Scrapbooking Kit 59
G1052 Workshops on the Go® Pear & Partridge Scrapbooking Kit 65

Retiring Stamps in the Spring/Summer 2012 Idea Book
Item#    Stamp name     Page #
A1104 A Tweet 90
A1111 A Tulip 68
A1116 A Melody 94
A1122 Bravo 92
A1128 Quick Cards—Shell 80
A1129 A Rainbow 85
B1365 Spring Up 71
B1369 Rosy Regards 67
B1374 Bee Happy 83
B1397 He Is Risen 74
B1402 My Peeps 72
C1439 Enjoy Life 95
C1440 Take a Picture 93
C1442 Tailor-Made 94
C1450 Eclectic Edges 99
C1452 Delight 71
C1455 Aspire 96
C1456 Heartfelt Treasures 68
C1457 Happy Camper 84
C1458 Paper Lantern 90
C1473 Remarkable Wreath 70
C1474 10 Things 105
C1485 Super Powers 47
C1498 Country Life 82
C1499 Perfect Day 80
D1195 The Works Alphabet 117
D1222 Tiny Typewriter Alphabet 117
D1296 Chocolate Alphabet Small 114
D1301 Hodge Podge Alphabet 114
D1303 Classmate Alphabet 114
D1462 Splendid Day 77
D1464 Card Chatter—Love 106
D1467 Trees & Things 76
D1472 Simple Memories 66
D1478 Bingo Alphabet 113
D1505 Roar! 89
D1508 Diverse Backgrounds 102
D1509 Magic Adventures 78
D1511 Kick Back 81
E1013 Field Trip Alphabet 114

Warm wishes,

Monday, November 26, 2012

Mall Rat {Studio J}

This is my secret name for this layout. Shh, don't tell Brook! (I don't want to scar her for life with my outdated vernacular, at least, not any more than I already have.) It's said with affection!

My sweet baby girl is growing up so fast! These pictures of Brook are from a few years ago, just after she turned seven. Seven is Heaven! They are a collection of random shots of her being girly over a few months that summer that just didn't go with anything else. Together, they paint the picture of a pre-tween tomboy who is just starting to pay attention to girl stuff (but don't tell anyone).

The focal shot is of Brook on a girls outing at the mall - just the two of us and no boys. In our house, this a real rarity! Brook was so excited to be doing Mall Stuff. We shopped (and bought!) just for her, we found some gifts for others and we had an Orange Julius at the food court which is what I remember most about being a kid and going to the mall. It became a tradition of my best friend and I to hit the Hello Kitty store and have an Orange Julius (remember when you used to be able to go places alone as a kid?)

When I met Brandon, he would always have a fresh, hot pretzel, so that became a tradition for us that we have shared with our kids as a family. For me and my princess, though, we did the girl thang and got Juliuses! Enjoy the moments.

Warm wishes,


P.S. - Don't forget Cyber Monday lasts through 11:59pm!

Monday, September 10, 2012

Easy Party Planning with Cricut {Video}

Hello folks! I just saw this great video on YouTube and wanted to share it with you. With school in session, the kids birthday parties ramp up and Cricut Artiste is a great way to simplify your headache and make an extravagant impression - all at the same time. We have quite a few bridal and baby showers in our family this year and I know where I'm getting some of my decorating done in a snap!


See, just let the Cricut work for you so you have plenty of time to manage the other details of your event with ease. For more party ideas, see here, here and here.

Warm wishes everybody!

Monday, June 4, 2012

Happy Birthday My Love {Studio J}

This page is dedicated to my man, my main squeeze, my partner in crime, Brandon. Yeah. I know he's not pictured here. (He hates his picture being taken.) This is what he gets to wake up to every day.. one perfect princess, one tough guy an adorable baby and ... the three year old. (Garrett :)

He's an amazing man to deal with these crazy kids (did I mention Garrett is THREE?) and keep this household running like a well-oiled machine while I am working all day. The amazing thing is he's still sane *mostly* and he loves them all to pieces. Happy birthday to the best Daddy and Husband ever! I love you so much and I am so privileged to spend this life with you now and forever!

(This page was a particularly difficult morning for the then-two year old, Garrett. These pictures, taken by Brandon, perfectly captured the feeling of getting up too early because Aidan was just a little too loud waking and couldn't resist getting his brother up to *help* with breakfast. You gotta love it. One day we will. Right? ~Lol)

Page created in the Studio J Online Srapbooking suite here using My Reflections Roughing It.


Friday, February 10, 2012

Tuscany with My Sweetie

You got to see the photos on my personal Facebook page in November, but now check out the finished pages. For Mom's birthday, the whole family met at the local upscale joint, lol, for a very nice dinner to celebrate all Mom does for us. With a large family, she never gets to see everyone together, so it was the best present! Thanks to my sister-in-law Holly and Dad for coming up with it. If you want to read the story behind the Bro-Staches, see it here.

This is another quick layout you can make using the Roxie kit in Studio J. The kit comes pre-loaded with the papers as they are and I added 2 copies of the My Stickease scroll along the left side picture to add some sophistication and ambiance to match the location. It didn't start out as a particularly romantic Date Night, but since we so rarely get to go on date nights, I'll take what I can get! This kit is retired in paper, but you can still create with all of the papers and My Stickease online in Studio J. As you can see, it doesn't have to be Valentine's Day to scrap the one you love!

Warm wishes,

Tuesday, July 19, 2011

A Fanfare Birthday


I've been trying to go through my old prints and finally get them scrapbooked. It's amazing how many times I've jumped over these pictures because they were more CARS. Now, don't get me wrong, I like cars, especially fast ones! There was a time however, when Brandon and I first met (before kids, lol!) when our whole life centered around cars and dogs. Oh, the simple times! Lol! I just got so sick of trying to find a cute page for essentially the same thing. (Pre-CTMH and our wonderful pattern books!) I guess these must have gotten buried in the box for a few years, but that's ok, because they were ready to shine with Fanfare!

I will confess this layout has been giving me fits for two months. I've had a hard time coming up with the right embellishment mix - always my dilemma. I think I finally hit on it though. What do you think?

I used Fanfare papers and the blue button collection for embellies and then added some Cricut letters and a banner (LOVE this look, still). On the Cranberry banner, I stamped the HAPPY from the Classmate Alphabet in Versamark and then heat embossed with White Daisy. I added a little 3D foam tape to make them stand up and then tied them with Waxy Flax.

Thanks for stopping by!

Warm wishes,

Published with Blogger-droid v1.6.6

Thursday, June 9, 2011

Brandon's Birthday Card and More Baby Layouts


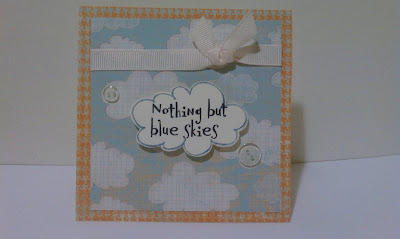
I've been on a retro kick lately! Here is the card I made for Brandon's birthday. It features Over the Rainbow and is a great happy-day set. (I seem to be finding many birthday uses for it, too!) I absolutely love clouds (hence the Silver Lining) because they are so much fun! You can see another birthday card with this set here.


And here are some more baby book pages of Garrett. We're almost done, here, so bear with me! Lol! Again, there is not much in the way of embellishments. I really am just looking to get these DONE! (I do wish I could have used Studio J's photo editing feature to erase that hospital gown, though..) You can click on the pictures to see a large version or to read any journalling.

Don't forget that all during June you can get a free jpeg download of one of your layouts to do with as you please, just for having a Studio J account! You can create one here on my website. Then when you create your layout you will have the option to add it to your cart and get a free Jpeg. Next, you want to stop by my Facebook Fan Page and "Like" me to get all the updates, including a link on how to upload your Studio J Jpeg to enter a contest to win 10 more Studio J layouts, free shipping and 10 free page protectors! Go here to LIKE me today!

You'll want to get all the updates, especially later tonight when I announce how to win some swag for Liking my page!

Warm wishes,


Published with Blogger-droid v1.6.6

Saturday, May 21, 2011

Sweet Dreams Banner


I just finished this banner for Brook's *belated* birthday this weekend. I had seen a photo for a wedding where the couple was arranged on a picnic against a shed backdrop with a pastel banner across the background and thought that would be cute for Brook's room. Banners are all the rage and Close To My Heart has these cute chipboard banner pennants in packs of 8, so now to the designing..


Her room is in pastel butterflies in Spring Iris and Sweet Leaf with a little of the old Breeze thrown in. Really cute, but hard to match decor surprisingly!! To get the right colors I used a bunch of scraps from my stash. Some old Breeze cardstock along with B&Ts from Life Delights and Whoops-A-Daisy, all of which are retired. Sorry for all the old stuff, but I bought it when we picked her room colors a few years ago. She has been asking me for decor for her walls, but I wasn't quite sure what to settle on until I saw these banners.


The letters are cut on the Cricut out of Chocolate cardstock and the stamping is in Chocolate, White Daisy and Spring Iris with a pop of Watermelon (retired) on the daisies to match the B&T. We have a glitter and unicorn kinda girl, so Prisma Glitter is used in liberal amounts. Check out each picture in finite detail by clicking on it for a larger image.


Brook loves it and I think it turned out pretty cute, too! 

Supplies Used:
My Creations Chipboard Banner (2) *8 pieces are included per package
My Acryix Stamps: Simply Splendid, Treasures, Find Your Style
Retired products: Watermelon ink, Whoops-A-Daisy My Reflections, Life's Delights My Reflections, Daydream My Reflections, Breeze cardstock and Top Coats Rockin'.

 Warm wishes,

Friday, May 20, 2011

Celebrate U Card


This is a card we made a few years ago that was one of my favorites. I haven't put it up on the blog before, so I thought I would share it with you. It was made with That's Amore papers and Damask Tiles. I'm so glad so many of you liked it! I have received it back a few times from friends and family. It's great to see you are sending your cards out to those you love! Designer's Tip: Use a little Liquid glass over the small tiles to make them pop and add dimension!

Happy Crafting!

Published with Blogger-droid v1.6.6

Tuesday, April 19, 2011

April 5 for $5 Card Class Instructions

Hey ladies! Thanks for your patience in getting these pictures and instructions up! We had a great class with some fun new ladies this month! Be sure to bring a new pal next class so you can pick a prize out of my goodie basket (valued up to $34.95!!) Kari, Anja and Becky all got to pick prizes this month! On to the fun!
This first card pictured is from the Miracle kit, which we also worked with during Play Dates. Featured stamp set is Fill in the Blank. The clouds are stamped using the flower stamp. Remember with our My Acrylix stamps you can position them on the block any way you want and they just spring back to their original form when you pull them off! So smush some clouds, baby! The butterflies are adhered only in the center to lift the wings up a bit as if in flight. Edges are distressed with Desert Sand using the Direct to Paper technique - just rub the ink pad along the edge for as bold and edge as you wish! The words on your Sweet Leaf piece are barely inked to give it a sponged effect. Remember to click on the picture to zoom in to see detail!

Anj requested this one because she LOVES buttons! Using Salutations Seals, we stamped the Buttercup piece then the White Daisy piece with the same stamp. Using the Circle Punch, punch your buttercup piece around the stamp and then using Micro Tip scissors, trim around the edge of the stamped image on the White Daisy piece. Adhere the white over the buttercup using the stamped image as a guide and set aside. Dry emboss the front of the hollyhock base every 1/2 inch, making sure the raised image is facing out from the front. You can do this by running your stylus down the groove in your paper trimmer - make sure the face is down. Then lightly sand the surface to expose the white core. Adhere as shown.


Over The Rainbow is such a fun, cheerful set. This is my dark twisted spin! Lol! Cut out the center, black rainbow band and adhere in the space between the two Pansy Purple bands. Then trim around the whole image. Cut out the cloud and cut down the center. I sponged the edges in Pansy Purple, also. Cut out the tags, "Somewhere" and "Over the" and Direct to Paper distress with Pansy Purple. In this image, the letters for "hill" are from the Lots of Dots Irresistibles cardstock adhesive-backed alphabet. For your kit, I just Cricut cut the letters in Pansy Purple to keep the cost for the kit at $5. You could achieve a similar result by stamping in White Daisy pigment ink and/or embossing with White Daisy embossing powder.
This is on a Desert Sand base and most if it is done for you! Cut out the red lantern and adhere with some 3D Foam Tape and the hanging "strings" with a Chocolate, Desert Sand or Black marker. This was inspired by Vicki Wizniuk's art.
This 5 inch square card is from the Hope For Japan set, available now until April 30th. It's discounted at only $5 for this A-size stamp set and all profits go directly to the American Red Cross and their efforts in Japan. Papers are a retired paper kit, That's Amore, plus Black and Colonial White Cardstock. The central image is stamped twice. Once on the main square pieced and once more on a scrap, then punched with our 2" Scallop Circle Punch. After sponging the edges of the scallop in black, the image is overlaid to match the image below with a little 3D Foam Tape. Card design by Karen Pedersen - yet another wonderful reason for becoming a Consultant on my team!

Thanks so much for stopping by! My next 5 for $5 card class is the first Thursday of the month, on May 5th at 630 pm. Let me know if you would like to attend or would like to purchase a kit.

Warm wishes,

Monday, March 14, 2011

Happy Anniversary Wizard's Hangout!


Just wanted to send a shout-out to Vicki Wizniuk and congratulate her on 3 years of blogging! She is a pioneer in the blogging arena and is always full of fun ideas and inspiration. (Plus she makes the cutest card kits ever!)

This is one of the cards that inspired me to make the card pictured. I LOVE the color combo and had so much fun making different colored Valentines!

Please stop by and congratulate her on her acheivement! Keep it comin', girl!

Warm wishes,

Friday, January 28, 2011

It's a Mayberry Birthday

This week at Crafty Wednesday, my good friend, Yvonne Wickham (who introduced me to Close To My Heart) presented me with this beautiful card and bookmark for my upcoming birthday. I was so surprised and delighted! She's a fellow consultant and one of my team and just another person I've been blessed to meet through my business.

This card features the Mayberry kit that will debut in the brand new Spring/Summer Idea Book February 1st. You can get your own book now by calling or emailing me; or check it out live on my website this Tuesday!

The bookmark is just darling and made from a washer, some B&T, glitter and Liquid Glass. Fantabulous! Thank you, Yvonne, for the lovely gifts!

Warmly,
Trisha
Published with Blogger-droid v1.6.5

Wednesday, August 11, 2010

Hedgehog's Happy Birthday

Today is one of my nieces birthday. I have a few.. ;) I've been wanting to create a great birthday card for this special little girl and the July Stamp of The Month, Happy Forever, came to mind. This is such a cute little set of funky hedgehogs.

I really had fun with the paper layering technique as you can see! Both images are simply stamped multiple times on the different colors of paper and then the pieces cut out and layered on the base image.

This first card is pretty simple and features CTMH's Zippidee Level 2 paper pack. Using chocolate ink, the balloons are stamped on the argyle and cut out as one piece so the pattern remains connected. I stamped the hedgehog's prickles or "mane" on the reverse of the argyle, a nice monochromatic Desert Sand His body is stamped on the front side of the bamboo stars and cut out and layered on top.


The second card (for my other niece) is a little more technical but the same principal. The base image is stamped on the argyle first, then the cardstock and ribbon are applied. Next, the colonial white with the 2nd stamped image is lined up with the first and adhered. Each balloon is cut out from its own cardstock, Cranberry, Dutch Blue and Honey, then adhered with 3D foam tape in place. The hedgehog is colored using a Q-tip and chocolate ink pad. To create shading, just keep adding ink.

Happy birthday girls!!

Warmly,

LinkWithin

Related Posts with Thumbnails