Wednesday, February 9, 2011

Countin' Down!


It's day number 10 on the blog hop to Valentine's Day! Despite my best intentions and some FABULOUS artwork in the Links Party, I still found myself blinded by the kids' school parties. Text today: Don't forget your treats tomorrow for our class Valentine party! Me: Oh, crap!

Midnight run to Wally's and a quick run through the craft room and voila! Let me know what you think, then hop on to some other blogspot that are out of this world!

Warm wishes,

Published with Blogger-droid v1.6.6

Countdown to Valentine's - Day 9

Welcome Hoppers!
We're another day closer to Valentine's Day and even more fabulous art to show off!


This one came together all on it's own. I sat down and knew I wanted to use the XOXO stamp from Priceless Word Puzzle and sweetheart paper. That's it! Not bad, though. Black ink is used and some silver brads. I popped the letters with some foam tape as well. Thanks for looking, please leave some love below - I'll love you long time!

Then check out the linky party below for more Daily Works of Heart.

Warm wishes,

Published with Blogger-droid v1.6.6

Tuesday, February 8, 2011

Valentine's Day Countdown - Day 8

Welcome fellow Heart-Lovers!
We're counting down the days until Valentine's Day with a blog hop featuring DAILY Love notes - great works of art celebrating our most romantic holiday!


Today, my card is a bit of stretch for Valentine's as it was actually created for a baby shower card for my husband's cousin who is being *blessed* with triplets in a few months. I say *blessed* because - Wow! is it an amazing blessing, but Wow- that's scary to me!

However, after completing it, I thought it fit the bill for V-Day with the hearts and.. well, I'm using it! Lol! This is straight from Wishes - pattern, colors, design. The only thing I changed was the bling and I added pink hearts - she's having 2 boys and a girl, so her colors were blue, green and pink. The heart brad in the corner is not CTMH, but everything else is. They are just too fabulous not to use, though!

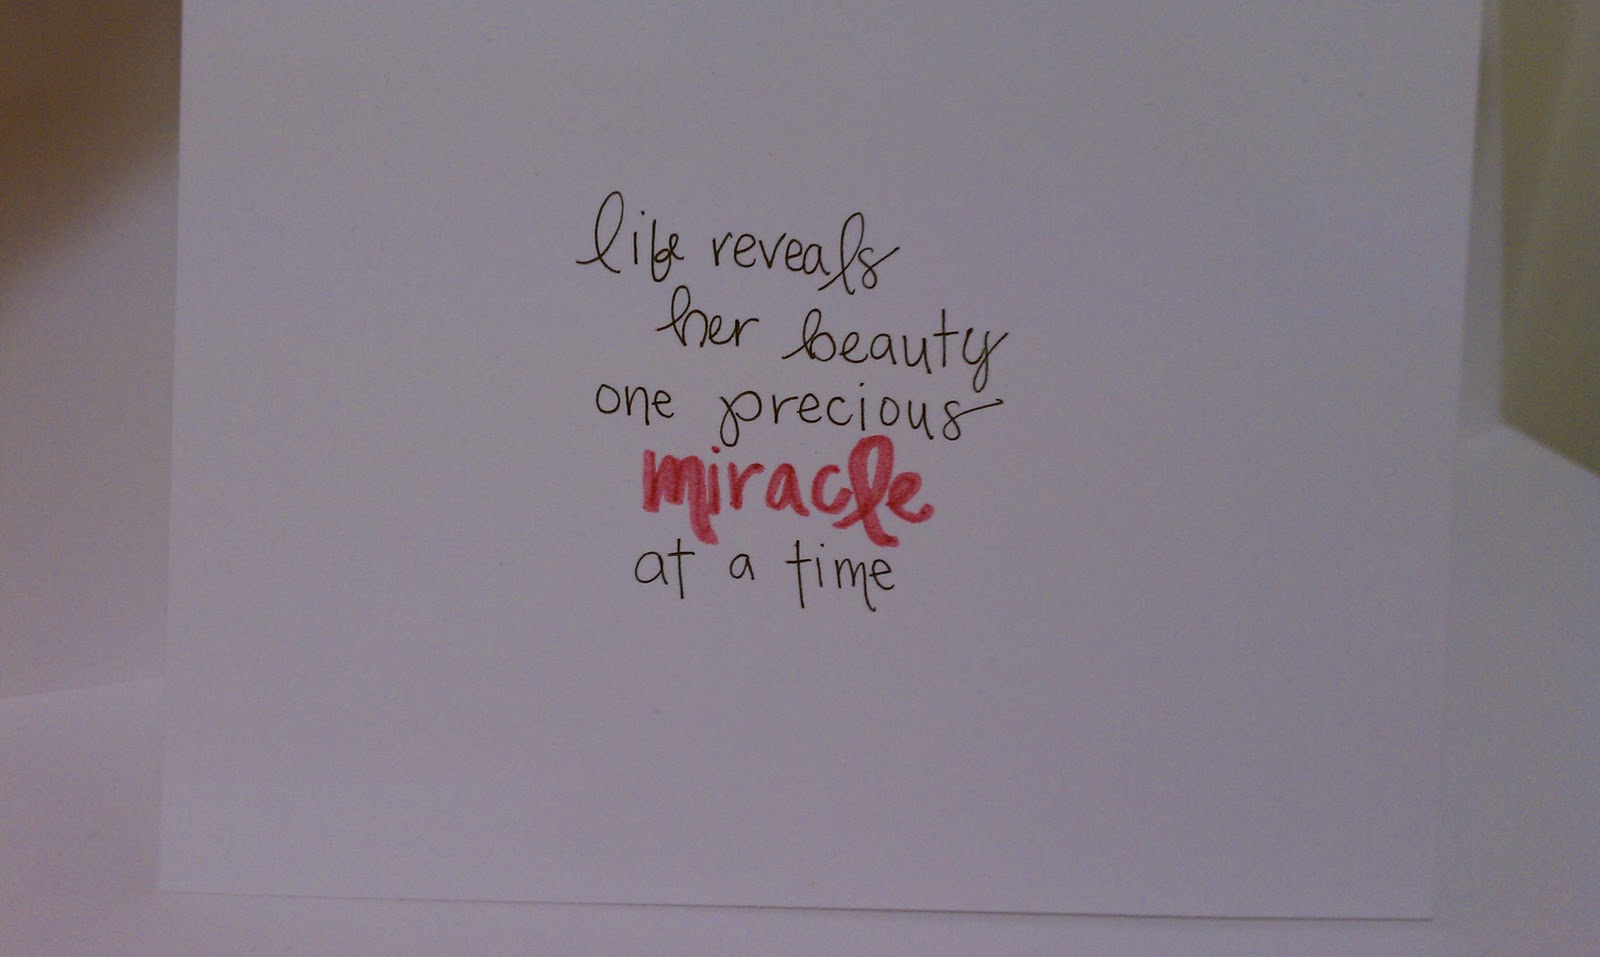
Since this is my duplicate copy the inside is left as original. It's a quote from the Unforgettable My Stickease. I thought it was appropriate for Valentine's Day as well. ~For Angie's I crossed out "one" and wrote the number "3" in blush marker, then also added an "s" to the end of miracles. It put a little spin on the surprise they felt at finding out they had triplets.

Supplies: Miracle papers, Sweet Leaf textured cardstock, Hit the Spot, Priceless Word Puzzle, Foundry Metal frames, Cherish Connections Rewards, Silver Brads, Mocha Opaques, Winter Cozy Buttons, Basics Embroidery Floss, Twilight Designer Ribbon Rounds.

Thanks for stopping by! Leave me some love and post a comment, then check out the linky party to see more fabulous DAILY works of heart!

Warm Wishes,


Monday, February 7, 2011

Countdown to Valentine's Day #7

Welcome Hoppers!
LOTS of techniques in this post!

We're halfway there! It's Day number 7 in the Countdown to Valentine's Day Blog Hop. There has been some STUNNING artwork this past week. I can't imagine what is waiting for us in the coming week! I've seen so many great ideas with this hop - I'm never going to get to them all, but I'm sure gonna try!

Today's artwork is from the class I went to last Friday by fellow consultant and best crafty pal, Yvonne Wickham. She got me into LOVING Close To My Heart and has recently come back into the fold after taking time out to have a baby and focus on her beautiful family!

SHE calls it a simple card class - I call it Techniques 301! We played around with several different skills and had a beautiful canvas to work with - the new Sweetheart My Reflections paper pack. They all turned out amazing - despite my ineptitude, lol! Thanks for inviting me, Yvonne!


 Liquid Applique
Okay, liquid applique is a great product we sell. It comes in a small tube and you use it like a pen. Simply draw where you want the design to go, heat emboss and Poof (puff?)! It goes on really thick and it expands 2 to 3 times its original size. It's just great for sheep, clouds, Santa and butterfly bodies. Oh, and flower stems, and ... Well, you get the idea. Anything to puff out a bit.

Reflection Stamping
Just like the name implies you stamp a reflection of it by using a brayer. Ink your stamp and stamp directly onto the brayer roll. Now you're going to line it up and roll the brayer to drop the inked image onto the paper. In this case, we inked a single heart for each butterfly wing. If you were to just stamp it on either side with the bumps on the heart out you'd have the "Egyptian Effect" as Yvonne calls it - one up and one down. Now to get the other side, you want to Second Generation stamp, by inking, then stamping off, then stamp right onto your art. The brayer acts as a Second Generation stamp and does remove some ink in the process. So to even them up and make the coloring uniform, you stamp off first on the regular non-brayered image. This works great with mountains and a lake or mirror scenes, too!
 Spray Pen
 This is a fabulous new tool which debuted in January Inspirations. You fill the body of the pen with about 7 drops of re-inker then top off with water (about an ounce total) then spray on your art! Simple! The closer to the art, the more full, solid coverage. This would work great if you ran out of cardstock for a project! On the middle square here, I was about 7 inches away from it to get the splotchy effect. Below, on the white candy hearts over the cotton candy circle, you can see the ink on the circle is pretty solid. That was about 3 inches away and a few sprays. You'll want to wash the spray pen thoroughly in warm water after each use to prevent clogging and bleeding - especially if you add in pearl paint.


Rock n Roll Stamping
 One of my FAVORITE techniques! This is done by first inking the image up, then stamp off the paper (onto scratch) to achieve a Second Generation impression. Before you stamp your project, you're going to take your inked stamp and roll only the outside edges in fresh ink. This will give you a dark outside "border" and a lighter center. This works best if you have the smallest block size possible for the stamp so you can better control how much ink and where it gets put on the rock and roll. It really gives you a depth to your stamps previously missing. To see a variation, look here.

Heat EmbossingThe white heart is embossed using a craft dryer, tweezers and White Detail embossing powder. Ink your image in Versamark Watermark ink and stamp. Then sprinkle embossing powder over the image and shake off excess into your craft tray. Using your tweezers (so you don't burn your widdle fingers!) hold the paper 3-4 inches from the dryer and dry until you see the image change from dry matte to shiny plastic. (You CAN over do it and burn your project so be careful!)

Masking
The "Love" tag is stamped with a word stamp that actually says, "I Love You." To only get the one word, use a post it note and cover up the "You" portion of your stamp. Now ink it, but leave the "I" un-inked. It doesn't matter if you ink up your post-it note. That's what it's there for! Now remove the post-it and stamp. Voila!

Masking of a Different Sort with the Spray Pen
When you have an image that is trimmed fairly close to the original design, you can put that item down on your paper, spray over it, then remove and clean the stamp. Now mount the stamp on your clear block and stamp the image in the white space left.
Pinwheel Flowers
Yvonne came up with a simpler way to do these flowers. Rather than four squares the size of the flower you want, she took a 12" long strip of B&T in the width of the radius. After accordion folding the strip, attach the two ends together. Then lay flat, positioned where you want it and add a dab of hot glue or Liquid Glass to the center. Add your grommet and squish in the circle to the center a bit to grab the glue and hold until set.


Box Pleats
The pleats are formed by folding a long strip of paper Up Down Down Up Up Down Down, etc. The UP is toward you and DOWN is away from you. Some people score them every half and quarter inch. I prefer them just a bit messy! This card took 2 2-1/2" x 11" strips, adhered together. I started in the middle over the seam to 'cover' it with the folds and worked out in either direction.
 Random Stamping
The pleats are white printer paper random stamped with Tulip hearts and then spray penned with a cotton candy re-inker and water mixture.

Sponging
The white paper flower is sponged with cotton candy ink to give it a little pop! All edges in all the cards are sponged in Tulip ink also.


Pleats
The cotton candy flower strip is folded back and forth to create a series of pleats. You want to fold a long and a short. Fold Down first, then a quick Up. Then go longer past the first fold before folding Down - so the pleats are staggered, rather than a flat accordion fold with everything the same size.

"Love" and the scroll are from the Bohemian alphabet. Both are Heat Embossed in Detail White powder as described above.
Whew! That's a lot of new techniques! Thanks for sticking with me and check out this fabulous art from my fellow consultants on the Countdown to Valentine's Day Blog Hop!

Warm wishes,

Published with Blogger-droid v1.6.6

Sunday, February 6, 2011

Daily Works of Heart

It's day number 6 in the Valentine's Day Countdown!

I hope you have been as inspired as I have with all these wonderful projects! Every day from now until February 14th you can see all NEW artwork featuring Close To My Heart products created by consultants from all over the United States and Canada! All consultants will be using thumbnail pictures which link directly to their blogs so you can stop by DAILY and visit with all the participants.

Something SWEET


This card was inspired by Vivki Wizniuk, a fellow consultant. It's another bold and beautiful combo that is non-traditional and full of zest! Good Times, Wings and Solo E combine to make the fabulous images here. Magnifique and some sunset cardstock shimmer like a beautiful beach - which is where I'd like to be right now, if truth be told, with our negative degrees wind chill! On the inside I used My Legacy Writers and my Tulip marker.

Check out the Linky Party below and see more Daily Works of Heart!

Warm wishes,

Saturday, February 5, 2011

Countdown to Valentine's Day Blog Hop Day#5

Welcome Hoppers!

We are counting down the days until Valentine's Day with DAILY art posted on blogs across the country! My fellow consultants are joining in each day to help give you some great inspiration on how to tell your sweethearts you love them this Valentine's Day.


Today I have a couple of cards featured. I started with this color scheme yesterday, after seeing it in a magazine and it's my next big thing! So much fun playing with colors and mixing and matching. I really like the bold contrasts presented here - and Grey Wool is the new black!

Supplies Used:
White Daisy Cardstock
Holllyhock, Tulip, Sunny Yellow, Honey, Grey Flannel and Grey Wool Inks
Just Because, Soul Mates, Code It and Treasures My Acrylix Stamp Sets
Sponge

Check out the linky party below for some more fabulous works of heart!

Warm wishes,

Friday, February 4, 2011

Countdown to Valentine's Day Blog Hop - Day 4

Welcome to Day #4 of our Valentine's Day Countdown!
This has been sooo much fun! I am really enjoying the challenge to be creative EVERY day and flex my skills! Sometimes they are simple, sometimes they are elaborate, but they are all VALENTINES! That's right! You can get DAILY inspiration here from now until Valentine's Day as my fellow consultants and I count down the days until the big V.


These 2x2 cards are pretty simple and are great for your child's classroom Valentines! Add some Bit o' Honey and you got yourself a winner!

I used:
Bee Mine Petite Perks
Lilac Mist, Honey, Tulip and Black Inks
Sponge
Blending Pen
My Legacy Writers

Thanks for hopping by! Check out the Linky Party below and HOP on over to your next best idea! If you would like to receive an email each time my blog is updated, please send me a quick message and I'll add you to my mailing list!

Warm Wishes,


Published with Blogger-droid v1.6.6

Thursday, February 3, 2011

Countdown to Valentine's Day Blog Hop #3


Another layout featuring Wings, Dimensional Elements Chipboard Hearts, the black Mini-Medley, and my sister and her fiance. I eA privileged to take their engagement picture 5 years ago and am FINALLY scrapbooking them!

Check out my fellow consultants' art on the linky below as we countdown the days until Valentine's Day with a whole lotta love!


Published with Blogger-droid v1.6.6

Wednesday, February 2, 2011

Countdown to Valentine's Day Blog Hop #2


Rolling on the second day with Wings and January SOTM
Published with Blogger-droid v1.6.6

February is FREE, FREE & FABULOUS!

Okay, a coupla' things here for first of term notices. It's a new IDEA BOOK today! Check it out online on my website. While you're there you can see the new Stamp of the Month, Friendship. The Idea Book is now a Semi-Annual publication and will come out for 6 months at a time to better coincide with your seasonal needs! It's jam-packed with 8 NEW paper packs, countless embellishments and over 70 stamp sets! Get your very own full color version in the flesh from me. Call or text me at 801.910.8698 or email slvrlinin@myctmh.com today!

February is the best time to join Close To My Heart because you can receive up to $491 in products and business supplies for FREE! February is 'Free, Free, & Fabulous' month. When you join as a new Consultant, you get to personalize your New Consultant Kit with your choice of three Choose Me collections where you can focus on scrapbooking supplies, stamping products, a MyCTMH website for your business, a 12-month Studio J membership for online scrapbooking at great discounts, and more. You can choose the collections that appeal to you. And the best part is, when you join in February, you will receive a New Consultant Kit rebate of $129 when you reach the first month and the first three months of our Straight To The Top program. And I'm there to help you all the way. But wait, there's more! When you achieve Straight To The Top, you'll also get $100 in select product credit as a reward! So, with a New Consultant Kit valued at up to $391/$434 plus the $100/$110 in free select product, it's a deal you've got to jump at right away. Free kit and free products make for a 'Free, Free, & Fabulous' February!

Here are just a few things I love about being a Close To My Heart Consultant and you will, too:

•I set my own work hours

•I can earn unlimited income

•I love meeting new people

•I love the friendships I've made with my customers and other Consultants

•I love showing others how to preserve their memories

•I love being paid to create beautiful artwork

•I love owning my own business

•I love working my business around my other priorities, like my family

•I love the financial rewards I've earned, including a family trip to Disneyland

•I love the product discount I get

•I love…

You can experience these rewards for yourself as a Consultant, and February is the best time to join Close To My Heart with our 'Free, Free, & Fabulous' promotion. I'd love to have you on my team! Sign up right now on my website or contact me today by phone at 801.910.8698 or email slvrlinin@myctmh.com!

Warm wishes,

LinkWithin

Related Posts with Thumbnails